Step 1: Figure out your custom placement CSS selector - How to locate where you want to place Stock Status Label?
There are two ways you can find CSS selector for your element on your page. Option1 is easier way, using an open source, free tool called SelectorGadget. Option2 is using browser’s Developer Tools.
Option 1: Using SelectorGadget Bookmarklet or Chrome Extension
First install bookmarklet from https://selectorgadget.com/ (or install the Chrome Extension).
Drag the bookmarklet link from the page to your Bookmark Bar:


Then go to your product detail page and click the bookmarklet (or click the extension) that loads the selector.

When SelectorGadget is enabled, your mouse cursor will highlight the elements and their containers as you move around.
Now locate and select (click) the element you want the stock label to be inserted after this.
The SelectorGadget toolbar at the bottom right corner of the page will display the CSS selector. You can click and copy that CSS selector and use this in stock label configuration.
Option 2: Using Developer Tools
Before you set up your Shopify App settings with custom placement, you need to figure out the neighboring HTML element’s CSS selector. This will be the way we’ll tell Product Stock Status App to locate and set the status label.
Best way to locate where you want to place stock status label is to use Web Developer Tools in Chrome (or there are equivalent in all major browsers). Below are steps to locate the element using Chrome Web Developer Tools.
First, open Developer Tools from Chrome menu,
View → Developer → Developer Tools
Then in the developer tools, click
Inspect button. It will make your cursor select the HTML Element you mouse over on your page. 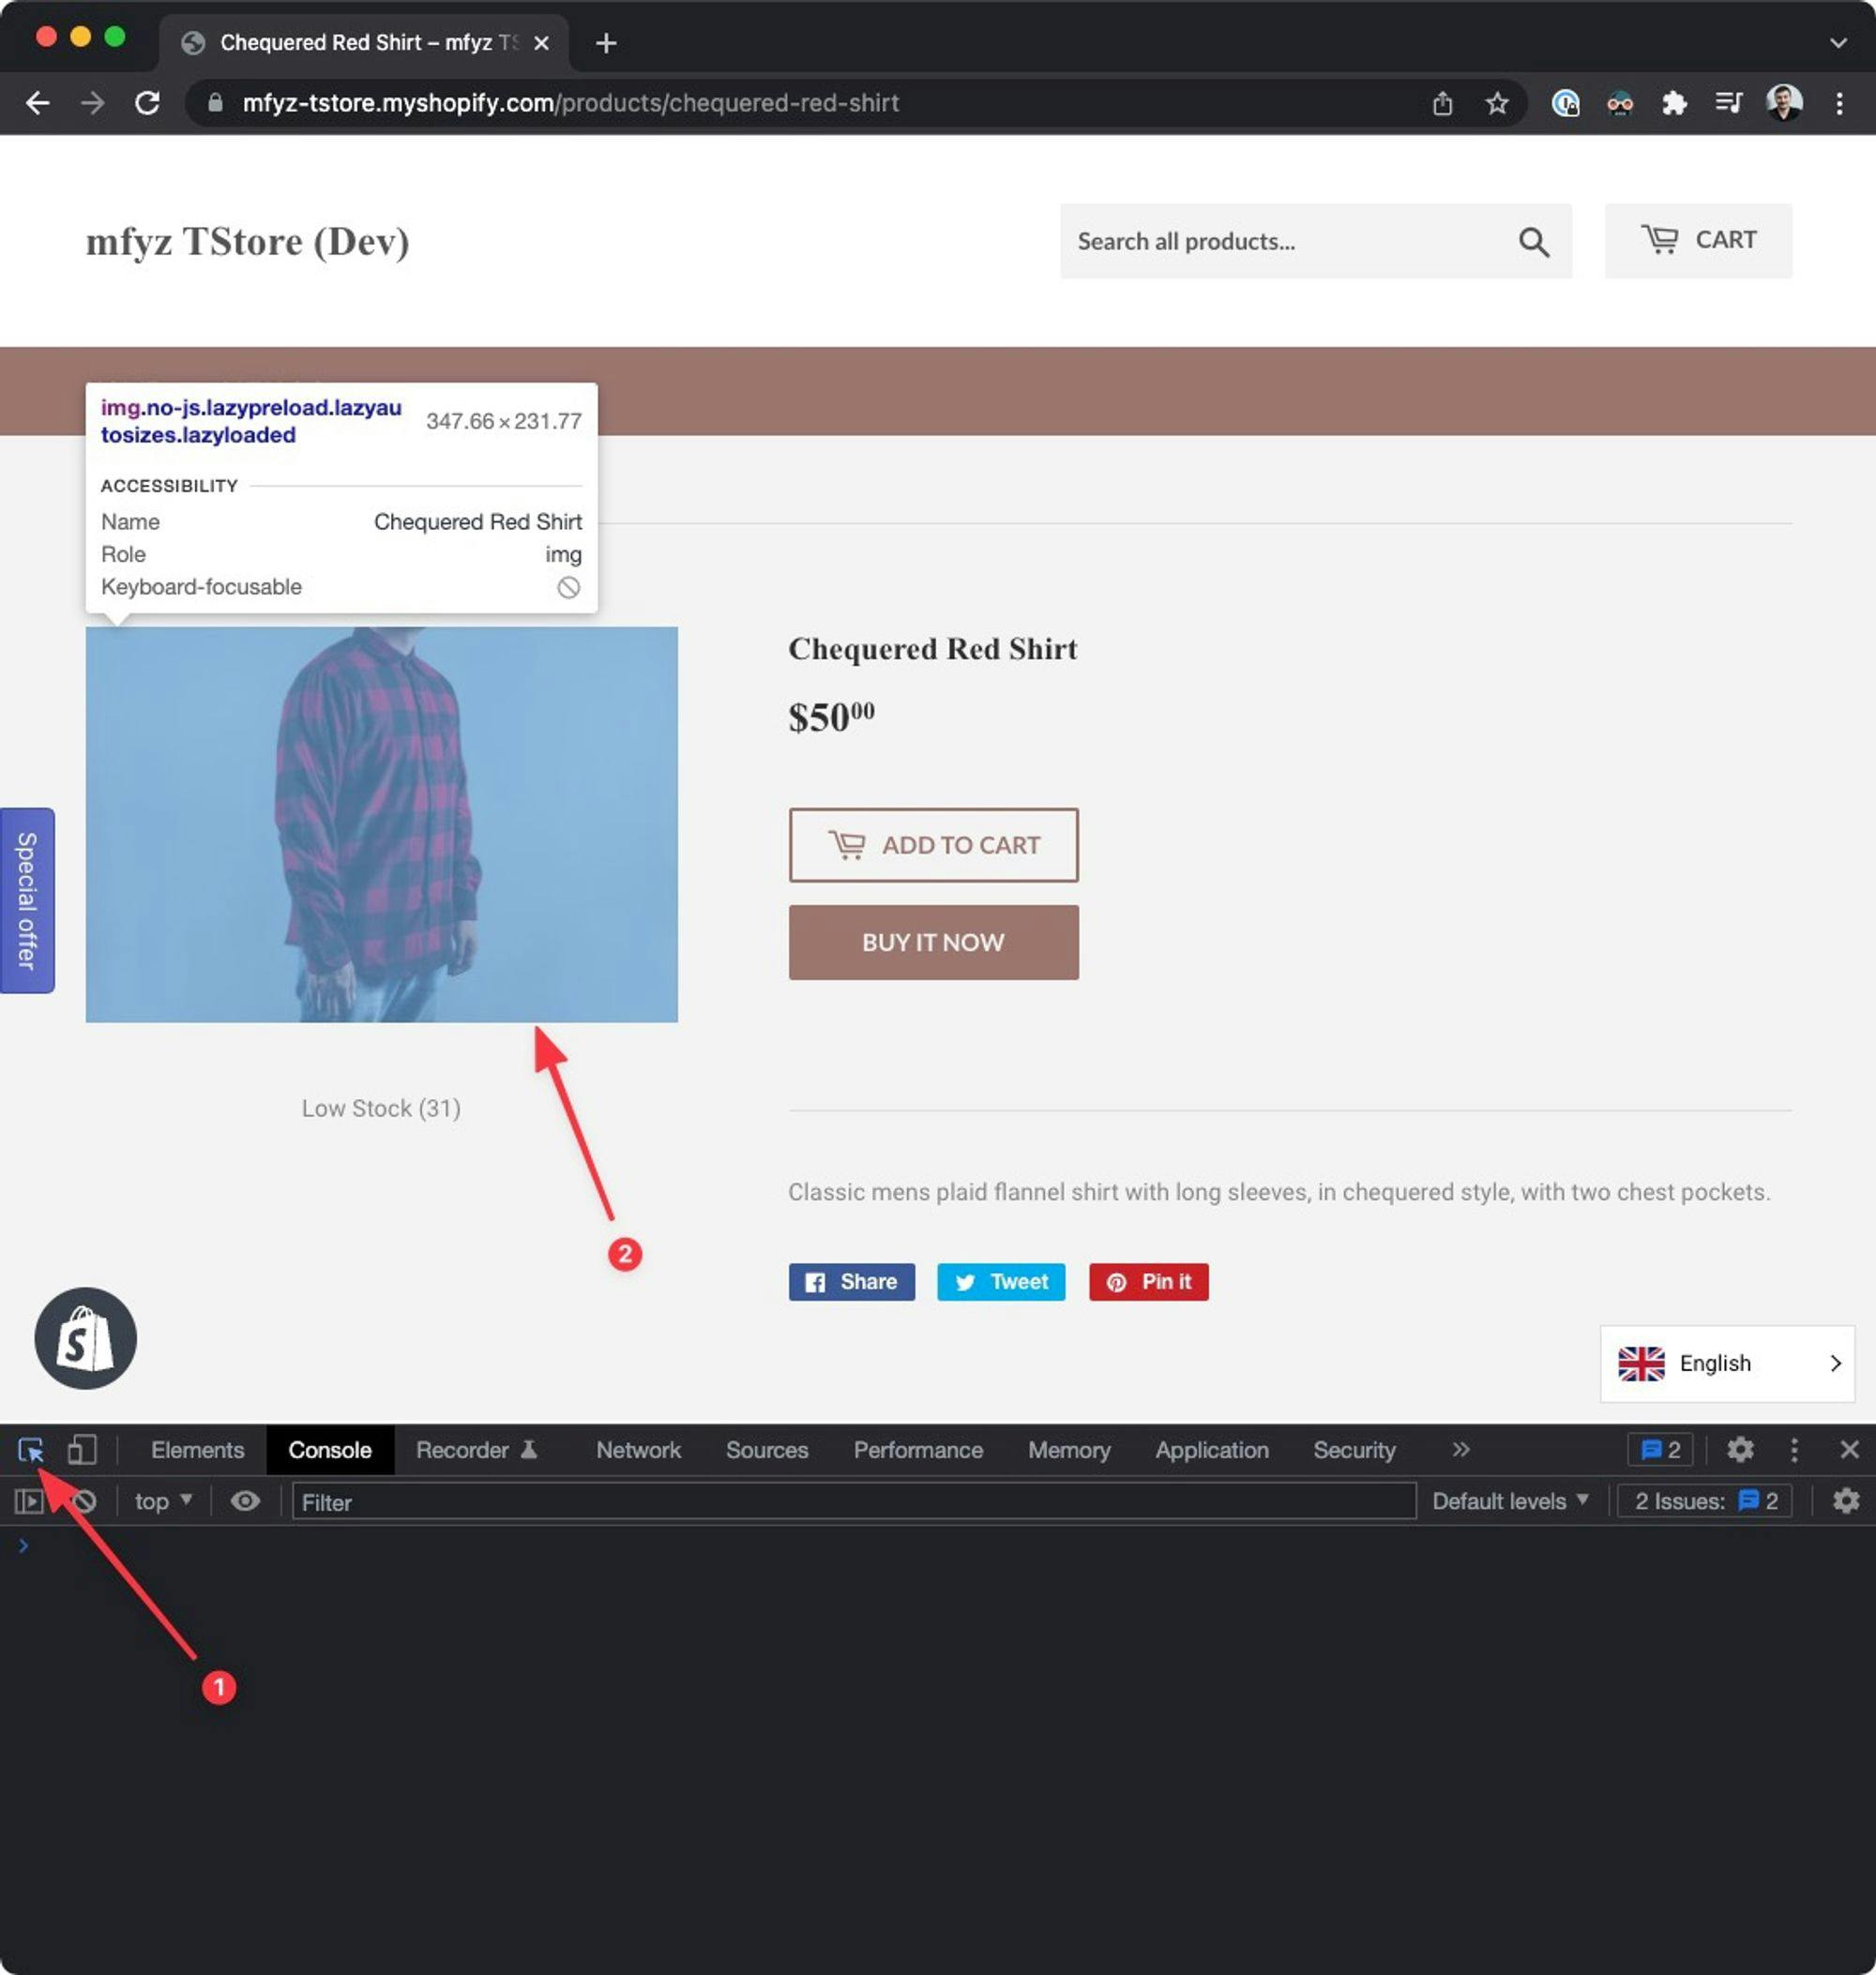
Click the closest HTML element you want to place the stock status label. After you click to the element, developer tools will display the HTML element tree that you can click the parent elements or sibling to the HTML element you selected. With this, we will try to find a distinctive address for this particular element. Easiest way to think about this is a unique identifier for that element. Usually defined as “id” attribute (that is unique), or “class” attribute where same class name might be used in multiple places in the same HTML page. But sometimes the naming of the class names are unique enough to have that element only once in the page.
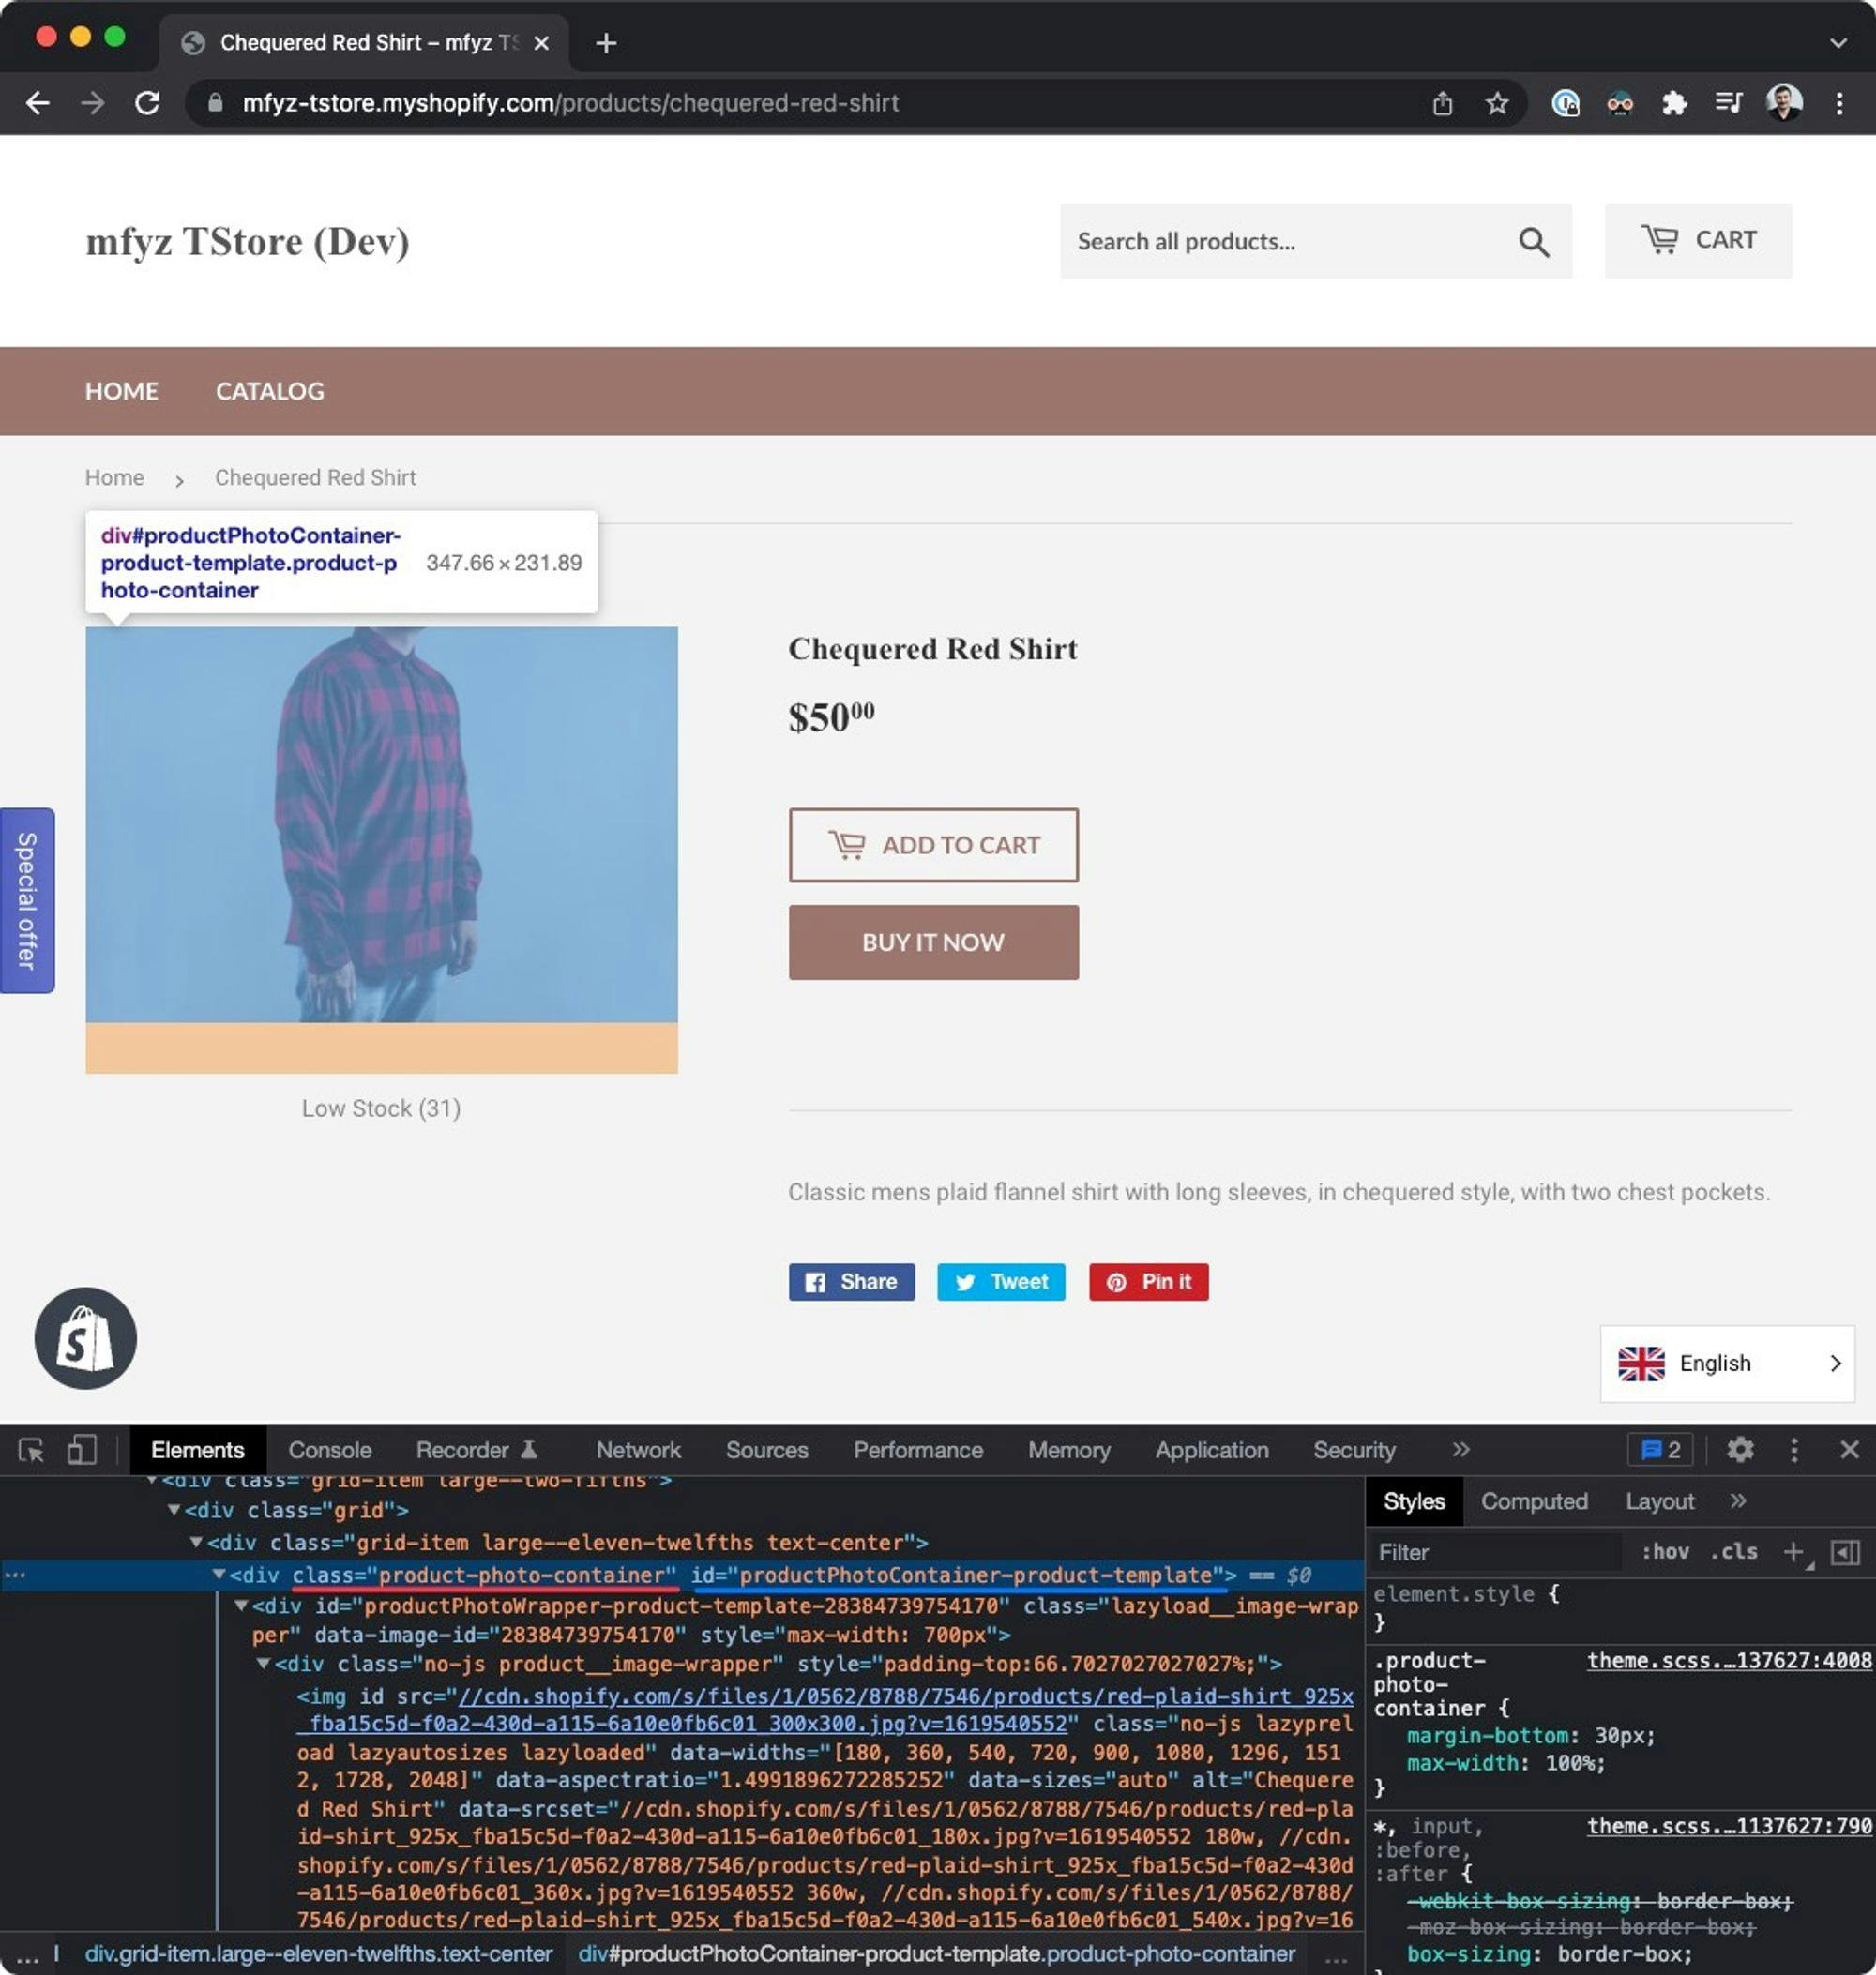
The example above, is for the “product image” which is unique in the page using both id and class attributes. For class attributes, we will use dot notation before the class name, and for id attributes we will use # character to address this element. So the example above can be found using either
.product-photo-container or #productPhotoContainer-product-template CSS selectors.Make sure the element you select exists in all conditions on your product detail pages. Some HTML elements may be conditionally displayed when a specific product variation or category.
You can learn more about the CSS selectors here: https://www.w3schools.com/cssref/css_selectors.asp
Step 2: Set up custom placement with your CSS selector in your Product Stock Status Shopify app settings
Now, we know our CSS selector for the HTML element, where the stock status label will be inserted after this element. We can go back to Shopify Admin, to Product Stock Status App settings, and in the Customization options, select the “Custom placement” option for “Where to display”. A text field will appear for us to enter the CSS selector of the element we want our label to be rendered after. Enter your CSS selector here and save the settings.

Now the stock status label will be inserted after this HTML element.
Your Shopify template styling may render stock status label in undesired styles, sizes and/or position depending on where the label HTML element gets inserted. You can implement custom CSS styles to your theme/template to customize look and feel of the stock status label further.